
Deploying a {plumber} API to AWS EC2 instance
Published:
In the last decade, R infrastructure has grown by leaps and bounds. Expansions like {Shiny} and {plumber} made it extremely easy to generate value with your analysis and models. In this short tutorial, we will focus on rolling out an API via {plumber} on a free-tier Amazon Web Services (AWS) EC2 instance.
What are APIs and why care?
APIs, or application program interfaces, are the means by which two different programs are able to communicate with each other. This becomes extremely useful when you want to give access to anyone to use your machine learning models. End-to-end data science deployment is becoming more common, and being able to make our models accessible should become a common tool in a computational social science toolbox. A great example here by Alex Gold at the RSTUDIO::CONF 2020:

Interested? Awesome! Let me take you step-by-step to through deploying your first API on AWS EC2.
Setup the AWS instance
You start by logging into your AWS account. Once in, you select an RStudio Amazon Machine Image (AMI) from this link. You are free to choose any, but it’s more efficient to choose based on your geography.
Once in AWS, you have to select the machine you want to run it on. AWS EC2 has a free tier option called t2.micro, and that’s the one I will be using here. Click Review and Launch.
In the next step, we need to modify how we will be able to access the instance. Find ‘Security Groups’ and click Edit security groups. We will add a couple of gates that we will use to connect to the instance:
- Add “HTTP”
- Add “Custom TCP Rule”, change Port Range to “8000” — this will be a way to access your API
- Add “Custom ICMP Rule IPv4”, change Protocol “Echo Request”, and add Source “0.0.0.0/0” - this will be to check whether everything works well and to troubleshoot. This can be later removed when not necessary.

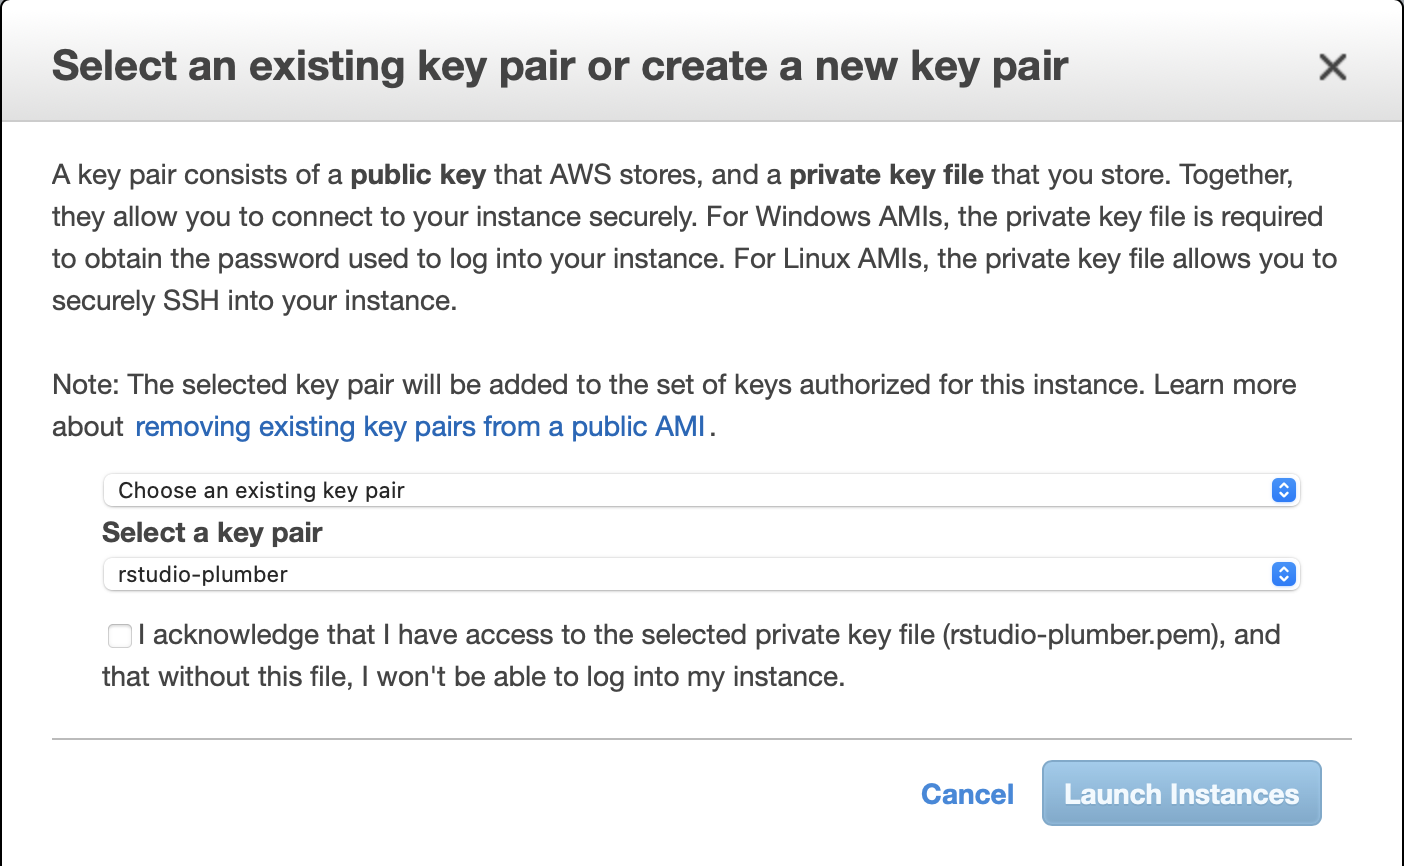
You can confirm your selections and move further. You will be asked about an _SSH key pair__. This is a tricky one: This window creates a file that will be used to access the EC2 server from your Terminal. We will need to do this to set up some things later. You can use an existing key pair if you have one (but since you are following this tutorial, it is more likely that you don’t). Select Create a new key pair and name it (e.g. “my-plumber-key”). This will initiate a download of a new file “my-plumber-key.pem”. For now, you can leave it in “Downloads” (if you are on Mac), but later it would be better to store it somewhere safe. Hit Launch!
If you are still confused or something does not work well, try following this guide: https://jagg19.github.io/2019/08/aws-r/. Sometimes it takes a bit of trial and error to get things right.
Now that your instance is successfully running, we need to log in via Terminal and install some missing pieces that will allow us to run an API on R and expose it to the world. Go to your AWS console and find your new EC2 (running) instance. Click on the instance number (a long number looking like this: i-098a9123e1c532a123… yes, I made that up). Find a Connect button and click it. Open the SSH client tab and follow these instructions:
- Open Terminal (or any other SSH client)
- We need to find the “my-plumber-key.pem” that you downloaded above. I left it in Downloads, so I will type
cd Downloads - Run this command:
chmod 400 my-plumber-key.pem - Connect to your instance with the following command looking like this one:
ssh -i "rstudio-plumber.pem" ubuntu@ec*-*-*-**-**.eu-west-*.compute.amazonaws.com. You can either manually adjust the command and fill in * based on your public address or you can directly copy this command from the AWS website in the SSH section that we previously opened.
Now that you are connected to your AWS EC2 instance, we need to install some missing components. The {plumber} package relies on a library called Libsodium for encryption, decryption, signatures, and password hashing. Ubuntu does not have this installed by default, so we need to download and install it. Hang in there, I know it is messy, but you are very close! Follow these steps:
- Get a link to the most current stable version (at the time of the writing, it is
libsodium-1.0.17-stable.tar.gz) on this page. The link I will use is this https://download.libsodium.org/libsodium/releases/libsodium-1.0.17-stable.tar.gz. It might change, so make sure you adjust it. - Go back to the terminal and run
wget https://download.libsodium.org/libsodium/releases/libsodium-1.0.17-stable.tar.gz(substituting your link). This will download the file to the hard drive of your EC2 instance. - You can check that if it happened correctly by running the
lscommand, which will print the contents of the current directory. It should contain a libsodium file — e.g.libsodium-1.0.17-stable.tar.gz, in my case. - The file we downloaded is compressed, so we need to extract it by running
tar -xf libsodium-1.0.17-stable.tar.gz(again, substitute your file name in case you are using a different version). - Again, you can check if there is a new folder by running
ls. If you see it there, you can enter it by runningcd libsodium-stable. - When you are in, execute the following commands:
./configure
make && make check
sudo make install
ldconfig (thanks to Rob Blackburn for emailing me about this!)
- It will take a while to install. When everything finishes, run a final command
sudo apt install libsodium-dev. If this fails, see the following page for troubleshooting. Sometimes Ubuntu decides to start updating some system files in the background and will prevent you from finishing the installation. If no errors occured, you are ready to do some R magic 🪄
Now we need to get into R and install {plumber}. We do this by sudo R and install plumber by install.packages("plumber"). Watch closely that you get any errors here. If the installation of Libsodium failed, you’ll see errors. And yay! Verify it worked by loading the package by running library(plumber).
Make things happen in R
If everything works well, you can log into your R session by going to the Public IPv4 DNS link in your instance summary (You can get this by going back to the AWS console, finding a list of your EC2 instances, and clicking on your running instance). It looks similar to this: http://ec2---**-.eu-west-2.compute.amazonaws.com (again with numbers instead of *).
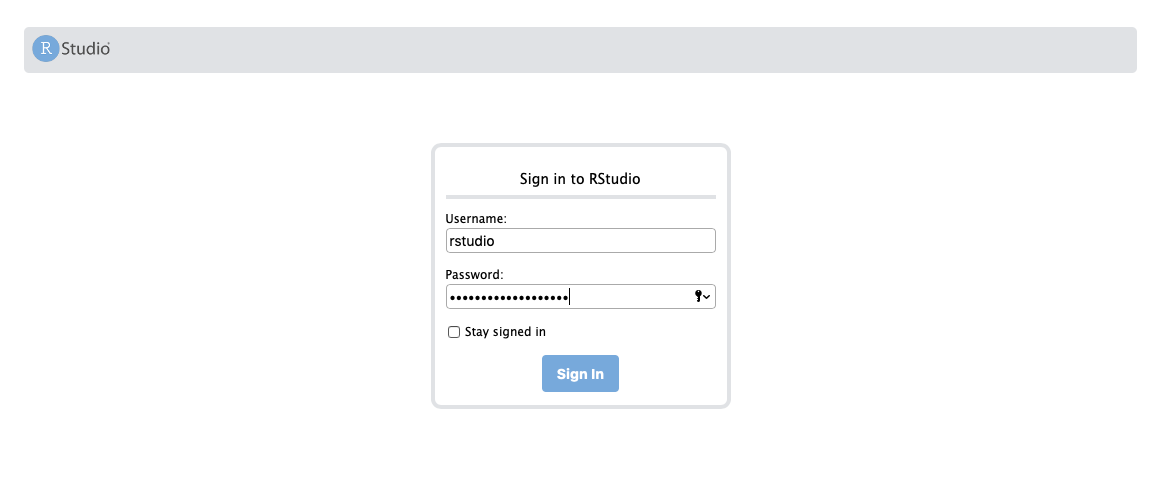
Your login is “rstudio” and the password is your Instance ID, looking like this i-23g0d124q24698123 (yes, I made this up). Change your password right away — there is guidance in the document that you see in front of you. It’s worth it for security reasons.
Now that we are in R, we will create a new folder called plumber-apis and in it two new scripts my-plumber.R and run-my-plumber.R.
In my-plumber.R, add the following. It does not matter at this stage what the functions are. You can add all your functions later. Let’s make it work first:
# plumber.R

#* Echo back the input
#* @param msg The message to echo
#* @get /echo
function(msg=""){
  list(msg = paste0("The message is: '", msg, "'"))
}

#* Plot a histogram
#* @png
#* @get /plot
function(){
  rand <- rnorm(100)
  hist(rand)
}

#* Return the sum of two numbers
#* @param a The first number to add
#* @param b The second number to add
#* @post /sum
function(a, b){
  as.numeric(a) + as.numeric(b)
}
In run-my-plumber.R, we add the following:
library(plumber)

root <- pr(paste0(getwd(), "/my-plumber.R"))
pr_run(root, host = "0.0.0.0", port = 8000)
All good? Awesome! Now I need you to search for Terminal in RStudio. It’s at the bottom, a tab right next to the Console. In the terminal, I need you to cd plumber-apis to get into the folder where you have your scripts (again, check if you’re there with ls) and run R CMD BATCH run-my-plumber.R.
Okay, now things are happening! Open the plumber-apis folder in the Files viewer on the right. You should see a new file called run-my-plumber.Rout. When you open it, you will see what just happened. If you scroll down and your file ends with
> pr_run(root, host = "0.0.0.0", port = 8000)
Running plumber API at http://0.0.0.0:8000
Running swagger Docs at http://127.0.0.1:8000/__docs__/
you are awesome and you just ran your first API on the AWS EC2 server. Are you curious what it can do? Take the Public IPv4 DNS link (the one looking like http://ec2---**-.eu-west-2.compute.amazonaws.com) and add :8000/sum?b=1&a=3 right at the end. The final link should look like this: http://ec2-*-*-***-*.eu-west-2.compute.amazonaws.com:8000/sum?b=1&a=3. Run it in your browser of choice. See the “4”? Congrats, that’s calculated by your awesome API! 😊 🔥